If you listen to any Hollywood “body transformation” stories, one common theme you’ll hear is people being tired of eating “boiled chicken breast”. The thing about chicken breast is that it’s very low fat and has no carbs in it, so it’s almost all protein. The problem is that it doesn’t have much flavor has a tendency to dry out easily. Even if you’re on a relatively “low” protein diet for a fitness person (0.82 – 1g per pound of bodyweight, at 175 pounds, you’re still eating between 150 to 165 grams of protein daily.
That’s a lot of protein, and chicken breast is one of the easiest ways to get that protein, even if it’s not the most fun. This particular recipe makes boiled chicken delicious, moist, and easy to eat. I first learned about it in this particular form Jack Spirko of The Survival Podcast, although the basic concept is quite common. Basically you’re making crockpot chicken breast, and then shredding it.
Ingredients
2 – 4 pounds chicken breast (if you use more, you’ll probably need more of the other ingredients)
One jar of salsa (I usually use Trader Joes green tomatillo salsa, but feel free to experiment)
Juice of 1-2 limes (if you want to up the ante, add the zest one of them)
1-8 garlic cloves
Chili powder to taste (I usually do 2 tablespoons; Jack’s original recipe uses “taco seasoning”) (see instructions below for an easier method than making your own chili powder)
Salt and Pepper to taste (I usually don’t use salt here, and add it to whatever I use the chicken with)
Chili powder the easy way
I used to make my own chili powder Altona Brown style. Now I just toss the component’s into the crockpot
1 tablespoon oregano
1 tablespoon cumin
1 teaspoon of smoked paprika.
As a bonus toss in some dried chile’s like Ancho and guajillo. (I do 2 of each)
Optional: cayenne pepper or Chipotle
Instructions:
Turn the crockpot on high.
Dump the jar of salsa, lime juice, garlic cloves, and chili powder into a large crockpot. Stir together.
Optional: Wait about 5-10 minutes until the mixture is hot
Place your chicken breasts in the crockpot, and make sure they are coated with the mixture. One easy way to do this is to put them in upside down, and then flip them over.
Cover with lid (very important; crockpots don’t work right if you forget this step)
Wait 4 hours. Remove Lid.
Remove the chicken from the crockpot and shred with two forks.
Dump the rest of the liquid mixture on top of the chicken and mix until even.
Done. Use as is or refrigerate for future use.
So what are the macros on this thing?
95% of the calories come from the chicken breast, so I completely ignore the calories from the salsa. A jar of Trader Joe’s Salsa Verde has about 110 calories in it, and you’re spreading it out over 3-4 pounds of chicken, but if you really want to track every calorie, knock yourself out. To figure out the calories
Weigh the raw chicken. Let’s say it’s 1560 grams.
Once the chicken is cooked, and you’ve added the liquid back in, weigh it again. Let’s says it’s 1740 grams.
Divide the raw weight by the cooked weight, and you’ll get a decimal. In our case 1560/1740 = .8965 or round it to .9.
WRITE DOWN THAT NUMBER!
Now let’s say you want to use 400 grams of chicken breast for a recipe, just divide 400 by the number in step 3. 400/.9 = 444 grams. That’s how much of our final prepared product you should weight out to get 400 grams.
Log 400 grams of raw chicken breast in MyFitnessPal (or whatever you use.)
So how do I use this stuff?
Use it like chicken. Eat it. But in case you’re imagination deprived, here’s a couple quick meals:
Shredded Chicken Bowl
This kind of mimics the main ingredients of a Chipotle Burrito bowl (minus the sour cream and corn). It has a huge amount of protein in it, and when you see this in the bowl, you’re going to think, “there’s no way I’m going to finish all that.” It’s a great first meal, because it’s high in protein with moderate carbs, and relatively low fat. It’ll provide a large proportion of your daily protein intake while leaving you tons of calories for the rest of your day. To reduce the carbs and calories you can leave out either the rice or the tortillas. If you want to up the fat a bit, use tortilla chips instead of tortillas.
Calories and Macros:
Calories: 937
Protein: 114 grams
Carbohydrates 82 grams
Fat 15 grams
Ingredients:
400 grams of chicken breast (raw weight using the calculation technique above)
3/4 cup of cooked rice
1/2 cup of canned black beans
One ounce of sharp cheddar cheese
3 small corn tortillas
Mix the first four ingredients together. Salt and pepper to taste. Eat along with the tortillas.
Shredded Chicken Omelet
This doesn’t really look like an omelet or taste like one, but it has egg in it, so…whatever. This is kind of the opposite of the recipe above. It’s got a relatively small amount of protein, almost no carb, and a decent amount of fat. You could reduce the fat by leaving the butter out, but why would you want to. It’s a great “small meal”. You could also leave out the butter and egg and use the mixture to make chicken and cheese quesadillas.
Calories and Macros:
Calories: 456
Protein: 49 grams
Carbohydrates 2 grams
Fat 28 grams
Ingredients:
100 grams of chicken breast (raw weight using the calculation technique above)
10 grams of butter (I prefer Kerry Gold)
2 slices of reduced fat cheese (44 grams; I use Finlandia variety pack from Costco.)
2 eggs
Melt the butter in a pan over medium and cook the chicken until it begins to dry out a bit. (Personally I hit the chicken with some extra chili powder for extra flavor.) Place the 2 slices of cheese on top and wait until it melts. Use a spatula to mix the melted cheese through the chicken. Scramble two eggs in a glass along with some salt to taste. Pour the eggs over the chicken and immediately begin stirring the egg throughout the chicken so that’s it’s evenly dispersed. Turn the heat to low, and once the egg is mostly congealed, form a flat chicken/egg patty and allow to cook for about 30 seconds. Flip and allow the other side to cook to desired doneness. Serve.
This recipe comes from the Good Eats episode “The Big Chili.” It’s a phenomenally versatile seasoning that can be used for anything from scrambled eggs to tacos to chili. It uses dried chiles. In South Florida, Walmart now sells these in bulk. So I just get six of each chile (double Alton’s original recipe).
Ingredients:
6 Ancho Chiles
6 Guajillo or Cascabel Chiles
6 Arbol or Japones Chiles (these add a bit of heat, so you could use any dried hot chile, such as dried cayenne)
4 tablespoons whole cumin seeds (you can use powder if you can’t find seeds)
4 tablespoons garlic powder
2 tablespoon dried oregano
2 teaspoon smoked paprika (this can be hard to find at most stores; I found it at Whole Foods.)
Instructions
Cut the stem end off each of the chiles, Cut a slit in the side and shake or rub the seeds into the trash. (You might want to wear gloves if you’re processing a very hot chile.)
Cut the chiles into small pieces and place in a heavy skillet over medium heat along with the cumin seeds. Keep the cumin and chiles moving until they start to smell fragrant.
Remove from the heat and place into a blender. In my experience when working with this double recipe, it’s better to pulse it a few times, and don’t let it go too long. Otherwise, the blender base will get hot, and the powder at the bottom will form a a cake that prevents the rest of the mixture from becoming blended. If you have a Vitamix with the dry blade, that would be ideal. Be very careful about opening the blender as you’re essentially making pepper spray (albeit a mild one). Don’t put your face in it.
Once the chiles and cumin are blended to a powder, add the garlic, oregano, and paprika and pulse to mix.
That’s it. You’re done. This stuff is amazing. And since you’ve been such a good audience, I’m going to give you a couple recipes that use it:
In the last few posts, I’ve talked quite a bit about how I’ve lost weight (31 pounds as of today). I’ve gone into some detail about the diet, but I haven’t really talked about the workouts much. There’s a couple reasons, but the main two reasons are 1) workouts are complicated, and 2) 95% of your results will come from your diet. There’s a reason fitness models say, “abs are created in the kitchen.”
I do plan on writing more about the workout in the future, but for today, I just wanted to give you some tips on how to do more chin ups (or pull ups if you desire). When I started this journey 14 weeks ago, I could barely do 4 chin ups or 3 pull ups. This Monday I did 5 chin ups with 40 lbs attached followed by a set of 6 chin ups with 25 pounds attached. Today (Thursday, I did a set of 13 bodyweight chin ups).
Now I know for some people that may not sound very impressive, but I haven’t been able to do more than 8 pull ups or chin ups since I was 19. And I certainly wasn’t as explosive as I am today. So here’s how I did it. You can use this method with either pull ups (palms away) or chin ups (palms toward you). Personally I prefer neutral grip chin ups (palms facing each other). For the rest of this article, I’ll just call them pull ups out of habit.
Some people will tell newbies that they need to be able to do 8 pull ups or 12 pull ups or even 20 pull ups before they start adding weight. But I prefer to start adding weight as soon as you can do 4-6 pull ups. I’ve never been good at doing lots of pull ups, and if I had waited until I could do 12 pull ups before adding weight, I’d probably still be doing 5 pounds. Below is how I did it, and you can too…if you like.
Step 0: Be able to do at least 4 pull ups
If you can’t do at least four pull ups, then that’s your first step. If you can’t do any pull ups, then follow this below video for a nice progression. If you can do at least one pull up, then do several sets of as many as you can do with good form at least three days a week.
Step 1: Add 5 lbs
Once you can do a at least 4 good pull ups, it’s time to add some weight. Get a dip belt. Attach 5 pounds and do a set. Wait at least 3 minutes, then do a second set bodyweight pull ups. On your other two workout days just do one set of bodyweight pull ups. So to recap: one set of weighted pull ups and 3 sets of bodyweight pull ups per week.
Note: I was doing this while on a fairly aggressive cut of 700-1000 calorie deficit per day. If you’re eating at maintenance or bulking, you can do three sets on your weighted day or even to two days of weighted pull ups (I’d recommend at least 3 days recovery between weighted sets.)
Step 2: Adding reps
Keep doing the weight you added in Step 1 plus two sets of bodyweight pull ups on other days until you can do 6 weighted pull ups. Here are some tips:
Focus on trying to make your upward movement as explosive as possible.
Try to keep your shoulder blades retracted (pull down and toward each other)
Don’t reach your neck for the bar.
Don’t struggle with half reps. When you can’t complete the rep with good form, don’t do it at all. If you really want to do another rep, jump up to the top and do a long negative (slow descent) or get an elastic band and do assisted pull ups.
Step 3: Add 5 more pounds
When you can complete six good, explosive pull ups, it’s time to add 5 more pounds.
If you can do 5 or more reps with the higher weight, then add 5 pounds again next week.
If you can only four reps with the higher weight, stay at that weight until you can get 6 reps and then add another 5 pounds.
If you can’t get four reps with the higher weight, drop the weight by 2.5 pounds the next week.
Keep doing your bodyweight pull ups for the second set and on your other two days.
Step 4: Add weight to your second set
When you get to the point where you’re doing pull ups with 10% of your bodyweight added, you can start adding weight to your second set. So if you’re 180 pounds, when you get to 20 pounds, add 5 pounds to your 2nd set. Generally speaking you should be able to get at least one more rep out of your 2nd set with lighter weight than your first heavy set.
Whenever your second set gets 2 good reps higher than your first set, add five more pounds to it. Follow the same rules as step 3 (but with a higher rep count).
Step 5: Take videos of yourself doing weighted pull ups.
That’s pretty much it. The video below is my second set of weighted pull ups this week with 25 pounds added. You can see my weight progression in the table below. Notice that even though my weight is going down, the total weight I’m lifting is going up. (So my absolute strength and relative strength are both increasing.)
Date
Weight
Set 1
Wgt w/body
Reps
Set 2
Reps
2/23/2016
196
0
196
6
0
3
2/29/2016
195
0
195
6
band
5
3/7/2016
194
0
194
5
0
4
3/14/2016
195
15
210
4
5
4
3/18/2016
193
15
208
4
5
4
3/23/2016
192
15
207
5
5
5
3/28/2016
192
15
207
5
5
5
4/2/2016
190
20
210
4
5
5
4/11/2016
189
20
209
4
5
5
4/18/2016
188
20
208
6
5
6
4/25/2016
188
25
213
5
5
6
5/2/2016
186
30
216
5
10
7
5/9/2016
186
35
221
5
10
7
5/16/2017
187
40
227
4
15
6
5/23/2016
184
40
224
5
20
6
5/30/2016
185
40
225
5
25
6
6/6/2016
182
40
222
5
25
6
Frequently asked questions:
Man! I could NEVER do weighted pull ups!
It’s not really a questions, but that is exactly what I thought until I started doing it. I’ve never been good at pull ups. When I was in the Air Force Academy, the max I ever did was 13, and I assure you the last five were not nearly as explosive as the last five in my video at the top. When you see someone doing pull ups with 70 pounds attached, you think, “there’s no way I can do that,” and you’re right. You can’t do it…now. But if you start with adding 5 pounds, increase your reps to 6, add five more pounds, rinse and repeat, you’ll be doing 45 pounds before you know it.
So what’s this simple secret you mentioned in the title?
Too subtle, eh? The secret is adding 5 pounds. As you get stronger, you’ll be able to do more pull ups with just bodyweight.
Does this work for weighted dips too?
Absolutely. It actually works even better for weighted dips. In the time it took me to go from 0 to 45 pounds for pull ups, I went from 10 pounds to 77.5 pounds for 6 reps for dips. The only thing holding you back is not using a dip belt. Some gyms even have one you can borrow. But if not, buy one on amazon.
Recently a New York Times article about the Biggest Loser TV show made a big splash on some of my friends’ Facebook pages. The article is essentially a human interest story about contestants of the TV show. In case you’ve never seen the show, it’s a “reality” TV show in which extraordinarily overweight people go to extraordinary lengths to lose weight on national TV. The show was a massive success for a while, and an inspiration for many people.
Some of the contestants lost upwards of 200 pounds, but there is a problem. Of the 16 contestants from Season 6 (the sibkect of the New York Times article), only one has been able to successfully keep the weight off. Everyone else’s weight has drifted upwards, some as high as they started out. Peppered throughout the article are quotes and tidbits from researchers who used the contestants to conduct studies in weightloss and metabolism as well as other researchers of metabolism and weightloss.
Your body wants to be fat, okay?
Unfortunately, the former contestants’ metabolisms had slowed significantly, with one of them burning 800 fewer calories per day than would be expected for someone of his weight. On top of that, a certain hormone associated with satiety and weightloss was much lower than normal. This has led some people to the erroneous conclusion that losing weight shouldn’t even be attempted because their body will sabotage their efforts because it wants to be fat.
Thankfully, this conclusion is completely unfounded, and I’ll show you why. Now for this particular post, I will NOT be reading any of the research articles referenced. I will only be critiquing the actual text of the New York Times article.
Disclaimer: I do not mean to deny or denigrate the experience of the former Biggest Loser contestants (BLC)—but I do mean to show how their fate does not have to be your fate.
Some basic research
The most important aspect of healthcare research when it comes to applying the findings to other people is called generalizability–how well a study’s findings can be applied to other people. The most influential component of a research study”s generalizability is how “representative” or similar the sample is to us, the general public…or you specifically. So for example, if researchers find that statin medications can reduce the rate of heart attacks in very high risk patients (for example, men who have already had a heart attack), they cannot generalize those findings to say that statins will reduce the rate of heart attacks in young healthy people with high cholesterol. They must first do the study again with the new younger population before they can scientifically (let alone ethically) say that statins will reduce heart attacks in that population.
So, although the BLC (Biggest Loser Contestants) study is fascinating and provides an interesting window into extreme weight loss, how meaningful is it to you? I am happy to report, “not very”. First, they took people who were extremely overweight, with many of them weighing 300-400 pounds. Then they put them through an extreme (I hate to keep using that word but it really does fit) weightloss regmien. For example, Danny Cahill, the Season 8 winner lost 239 pounds. To do this, he tried to lose a pound a day. He had an extremely restricted diet, and was exercising upwards of 7 hours a day. He had to quit his job in order to comply with the program. Here’s an excerpt from the article:
Mr. Cahill exercised seven hours a day, burning 8,000 to 9,000 calories according to a calorie tracker the show gave him. Mr. Cahill set a goal of a 3,500-caloric deficit per day. The idea was to lose a pound a day.
If he had not burned enough calories to hit his goal, he went back to the gym after dinner to work out some more. At times, he found himself running around his neighborhood in the dark until his calorie-burn indicator reset to zero at midnight.
Mr. Cahill knew he could not maintain his finale weight of 191 pounds. He was so mentally and physically exhausted he barely moved for two weeks after his publicity tour ended.
How representative is this experience for the average person? Does it represent you? I can tell you it’s not representative for me. My maintenance calories for my current weight is 2800. I need to eat 2800 (more or less) calories to stay at my weight. Danny Cahill’s calorie deficit was bigger than my entire diet. I would have to eat negative calories to have a deficit that big. My current exercise regimen is a 30-45 minute weightlifting workout 3 times a week plus an hour walk the other four days a week. So in an average week, I’m spending less than 7 hours consciously exercising—less than Danny Cahill did in a single day.
I’ve lost 26 pounds recently on the exercise regimen I described above and eating a thousand calorie deficit (1800 calories per day). Once a week, I would do a “refeed” day where I ate closer to 2800 calories. I eat chocolate every day. I drink milk most days (raw, grass fed, full fat milk). I have bread, pasta, steak, birthday cake. I have ice cream on occasion. I even had half of a Miller’s Alehouse “Captain Jack’s buried treasure” (an ice cream/Oreo/Heath bar pie served over hot fudge). I just had to plan my calorie intake for the day accordingly. Compare that to the draconian diets of the BLC described in the article.
I, in no way, feel deprived. Nor have do I have binge cravings (which I have had in the past under different weight loss plans). I could live like this the rest of my life if I had to. When I reach my goal weight of 175 pounds, if I wanted to maintain that weight, I’d need to eat more or less 2600 calories per day.
The point is that my weightloss plan is 1) enjoyable, 2) sustainable, 3) when I reach my goal, I get to keep doing what I’m doing but have more ICE CREAM!!!!
But Danny Cahill’s metabolism is 800 calories less than normal!!!
Okay, fair enough. If my metabolism were that much slower, I’m sure it would be vastly harder to maintain my weight loss. However, I don’t think that will be the case for a number of reasons. The first is that generalizable word again. My 1-2 pounds a week weight loss with minimal effort is not comparable in any way to Danny Cahill’s except in the direction of weight. He lost more than half his bodyweight. I’m planning on losing less than 18% of my max bodyweight. Moreover, once I’m done losing the weight, I’m planning on bulking (purposefully eating more calories than maintenance to build muscle). I’m fairly certain that my increased muscle mass will help boost my metabolism preventing me from sharing Danny’s fate.
The second reason I don’t think that I will share the same fate that I am eating a fairly high amount of carbohydrates, 35-45% of my diet is carbohydrates, which helps to boost leptin levels. Leptin is a hormone (secreted by your fat cells of all things) that helps promote satiety and weight loss. The contestants of BLC all had much lower levels of leptin even years after the contest was over.
But even if my leptin is low, and my metabolism is permanently damaged, I still don’t think it will be to the same magnitude as the BLC contestants. The contestants with the highest weightloss had the lowest metabolisms and leptin levels, so the effect is proportional. As a ratio of fat lost, Danny lost 239 pounds, with 3500 calories to a pound. So his ratio is 800:836500 calories or around 1:1000. My total fat lost will be 37×3500 = 129,500. So proportionately, I might expect to burn 140 calories less per day. I’m pretty sure I can handle that. Maybe the ratio is based on initial weight, and not weight loss. In that case, he weighted 430 pounds, so 430:800 or 1:1.86. So for me, starting out at 212 pounds, I could expect 394 calories fewer in a day. That’s significantly higher, but still doable. After all, I’m eating 1800 calories a day and losing weight, so if I had to do maintenance minus 400 calories, that would still be 2200 calories a day (400 more than I’m currently eating).
Now, there’s a very good chance that I’m not representative of you, but chances are much higher that your more similar to me than you are to Danny Cahill or any of the other BLC participants.
But he’s got a PhD from Harvard!!!!! You just have a PhD from University of Florida.
He’s a Doctor! And you’re just a Nurse!!! Actually, some of the researchers cited in the article are medical doctors while others have PhDs in related fields like physiology. The most important thing to remember is that science is not exact, and scientists are not perfect. There are huge gaps in what we know. In fact, one of the researchers actually says this in the article:
He cautioned that the study was limited by its small size and the lack of a control group of obese people who did not lose weight. But, he added, the findings made sense.
“This is a subset of the most successful” dieters, he said. “If they don’t show a return to normal in metabolism, what hope is there for the rest of us?”
Still, he added, “that shouldn’t be interpreted to mean we are doomed to battle our biology or remain fat. It means we need to explore other approaches.”
The unscientificness (is that a word?) of that middle line is simply astounding. The only sense in which this group of “dieters” were successful is in the sheer number of pounds that they lost. But they were quite literally paid to lose weight. They had professional coaching, and medical staff on hand to deal with overexertion. They were competitors, not dieters. There is simply no relative comparison to an average individual looking to lose 10 – 40 pounds of fat who has to fit whatever he’s doing into his every day life. Or as Greg O’Gallagher (who designed my current workout/diet plan) says, “Fitness should enhance your life, not rule it.”
And another researcher:
“There is a lot of basic research we still need to do.”
Every scientist thinks what they are working on is extremely important, and more than anything else, they want to keep getting paid to do it. I’m not impugning any of the scientists and physicians in the article, but scientists and physicians have been known to be a little, well, unduly enthusiastic about the implications of their research—statins in the water anyone? The article also glosses over some flaws in the research such as only measuring leptin and not “other hormones”. It doesn’t mention what these other hormones are. That’s probably the fault of the author, not the scientists.
Well if you’re so smart, why don’t you explain it?
It seems that most people (in the U.S. anyway) have a tendency to gain weight. For most of us, it’s a pound or two a year. As the article points out, a pound of fat is 3500 calories. There are conveniently 365 days in a year, so 10 extra calories a day will give you about a pound of fat in a year. 20 calories a day will give you 2 pounds of fat in a year. Let that go unchecked for 10 years and you’re 10-20 pounds overweight. Pretty cool huh? The key then is not to let your weight get out of control. If you can stop it after 5-6 pounds, you can lose that weight quite easily and quickly, and then regain it again over the next three years. We really don’t know what the long term metabolic rate effects of this strategy would be. But we can assume based even on the findings of the BLC study that the less weight you have to lose the less impact it will have on your metabolism.
We also know that certain hormones are associated with weight loss while others are associated with weight gain. For example, leptin is associated with weight loss or weight maintenance, while insulin is associated with weight gain. Interestingly, insulin helps build muscle as well as fat, but it’s much easier to build fat than muscle. This is why body builders typically do bulk/cut cycles. During the bulk, they gain both fat and muscle. Then during the cut, they try to lose the fat while trying to preserve the muscle.
As the article pointed out, there is a lot that we don’t know. For example, the field of epigenetics which is the mechanisms of how genes are turned on or off is showing that we may all have fat genes, but some of us have them turned on while others have them turned off. And it’s not necessarily only on/off, but there are degrees of on. And most importantly epigenetics shows that our fat genes can be regulated by environmental events such as overeating or near starvation.
A very interesting finding is that Adenovirus 36 (AD-36) can cause mice that were previously normal to become obese. If we can determine which genes were turned on or off we may be able to reverse engineer the process and cure obesity in humans. Of course there is a chance that we could unleash a Thinner-style curse on the world.
As the Terminator would say…
The future has not been written; there is no fate but what we make.
Don’t let a study that says your body doesn’t want to lose weight stop you from taking control of your health and life. Since I’ve lost weight, I feel tremendously better, snore less, have more energy, am tremendously stronger, and everyone says how much better I look.
And the best part is that it is almost effortless and definitely enjoyable. Okay. It’s not exactly effortless, but compared to doing P90x, it’s effortless. The workouts are strength building (not size building) workouts. That means sets of 4-6 reps with 2-3 minutes of rest in between sets. So most of my time at the gym is spent waiting around. The only “cardio” I do is an hour long walk while I listen to podcasts. The diet does take discipline, but it’s mostly about planning not will power. Because I get to eat foods I like every day, I never feel deprived. I just had to get used to measuring my portions before I eat.
Carpe Diem
12 years ago, I decided that I should try and look like Brad Pitt in Troy before I turned 40. (He was 40 at the time of filiming.) I’m about to turn 42 and for the first time think I actually have a shot at reaching that goal thanks to flexible dieting and strength training. I highly recommend that you start today. There are tons of free programs out there. Heck. Keep reading this article to get you started.
So where exactly did you get those calorie numbers earlier?
There’s lots of complicated ways to figure out your maintenance calories, but an easy rule of thumb is multiply your bodyweight by 15. So at 186 pounds, my maintenance bodyweight is 186×15 = 2790 calories or 2800 rounded up. If you want to aggressively lose weight, you want a 25% deficit which turns out to be about bodyweight times 10 or 11. You can read a lot more about the specifics of the diet I’m on in my last post.
Using a flexible dieting approach, you can eat whatever you within your calories and protein requirements. You can even break your diet strategically for social purposes (weddings, birthdays, etc.). If you’re looking for a very scientific approach combined with practical advice from coaching clients, I’d recommend looking at Lyle McDonald’s books (note, I get a small commission if you buy through my link):
Guide to Flexible Dieting (a great introduction to the concept of Flexible Dieting)
Ketogenic Diet Handbook (Keto diets are all the rage, and although I don’t think they’re especially wonderful, if it helps you stay consistent on the diet, hey, it’s worth doing right?)
As for workouts, I prefer strength training with barbells, and Starting Strength is a great beginner’s program.
In my last post on diet, I talked about how I found the Atkins diet and later IIFYM/flexible dieting. I did Atkins for 3 weeks before switching to flexible dieting. As of today (7 weeks and 2 two days total with 4 weeks on flexible dieting), I have lost 20 pounds. I’m now 192 pounds, down from 212 pounds on January 27. My pants are practically falling off me. By my birthday in May, I hope to be back down to 175 pounds. I haven’t been that light since 1998. (For longer term updates, see Six Months Later and 38 pounds Lighter, and A Fat Loss Year in Review).
But isn’t Diet just Die with a T?
Contrary to Garfield’s opinion, the flexible dieting is quite enjoyable. Believe it or not, with flexible dieting, I get to eat cookies and chocolate, and ice cream (albeit in relatively small amounts). Sometimes I actually have to force myself to eat enough food. In fact, you should eat food you enjoy every single day. If you don’t, you won’t want to stay with the program. Here’s a great video by Radu Antoniu explaining why.
Okay so how exactly does this diet thing work?
Basically, you just figure out how many calories you should be eating to lose weight. Figure out how much protein you need to not lose muscle mass, and then just eat that amount.
Figure out your calorie needs for maintenance.
Figure out your deficit (500 calories per day for 1 pound of fat per week (gross oversimplification warning))
Figure out your protein needs
Track your macros (I use myfitnesspal app)
Intermittent Fasting. (Skip breakfast)
Do strength training 3 times a week
Do 45-60 minutes of walking or other light/recreational cardio per day
Track Progress and make adjustments as necessary
Umm, could you be a little more specific?
Maintenance Calories
Okay, you want some details. Although there are lots of complicated ways ways to calculate your maintenance calories, there’s an easy way to estimate it.
If you are reasonably active, your maintenance calories are around 15 x your bodyweight in pounds. So if your goal bodyweight is 175 pounds, your maintenance calories are approximately, 15 x 175 = 2675 calories per day. If your goal weight is 130 pounds, then your maintenance calories are approximately 1950.
If you are more than 20 pounds above your goal weight, you should take things in 20 pound increments. So if you’re 200 pounds and your goal is 165, calculate for 180 first, then 165 once you get to 180.
The cool thing is that if you are heavier than your goal weight, if you just eat at maintenance, you’ll slowly lose weight. But who wants to take several years to lose weight? Let’s kick things up a notch.
Calculate your deficit
This is one of those Goldilocks things. If your deficit is too small, it takes too long to lose weight. If your deficit too big, then although you may lose some weight quickly, you probably won’t stick with the plan long enough to make your goal weight or be able to keep the weight off.
A pound of fat is around 3500 calories. So to lose a pound of fat a week, you need to eat 3500 calories less per week. Conveniently, 3500/7 days = 500 calories per day. You could just take your maintenance calories and subtract 500 or subtract around 20% of maintenance. Note, this is true in theory, but in actual humans, results will vary. Depending on how fat you are to start with, you might lose more weight than predicted at first but will most likely lose less weight than predicted later on.
So for the 130 pound goal weight, 1950 – 500 = 1450. (If you want a short cut, this turns out to be about goal bodyweight x 11.)
What’s a macro?
Macro is short for macronutrients (fat, protein, and carbohydrates). If your goal is to lose fat, and not muscle, then you need to make sure that you eat enough protein, somewhere between .8 and 1 gram of protein per pound of bodyweight. So for our 130 pound goal, the protein intake should be between 104 and 130 grams. This means that your protein intake should account for between 28% and 36% of your daily calories.
The rest of the calories should be more or less balanced between fat and carbohydrates, but it can vary from day to day, so one day you might be 20% fat and 45% carbohydrate, and on another, you could be 35% fat and 30% carbohydrate. You don’t have to obsess. Just make sure you’re around your target calories and minimum protein.
Here’s another video from our friend Radu explaining it with that cool Romanian accent.
How do I track all this stuff?
The short answer is, “There’s an App for that.” The two most popular apps are myFitnessPal and myNetDiary. Both are available for Android and iPhone. I started out with myNetDiary, but switched to myFitnessPal. The two reasons I switched are: my University’s cafeteria food is already in myFitnessPal, and you can modify your macronutrient goals without having to pay.
There’s a bit of a learning curve to it, so I’ll post a step by step guide in a future article.
But aren’t you starving all the time?
This is where intermittent fasting comes in. Basically, you skip breakfast. By eating fewer meals, you increase the number of calories you get to eat at your remaining meals. So if you eat 1450 calories for the day, at three meals each meal is less than 500 calories. If you skip breakfast, you can have two 725 calorie meals.
If you don’t mind different sized meals, you could have one 1000 calorie meal, and a 450 calorie meal. Which one you eat first is completely up to you. Or you could have a 1000 calorie meal, and then have 450 calories of chocolate instead of dinner. The choice is yours.
You might at first be hungry at first in the morning, but within a week or three you’ll actually feel better. As for, me it wasn’t a difficult change at all, because I don’t really like eating breakfast most days. It really helps not to be around food, so going to work, and well…working, I usually don’t feel hungry until around lunch time.
And some more of our friend Radu explaining how he does intermittent fasting.
Do I have to fast?
No. the fasting is really just a tool to make calorie restriction more enjoyable. It also has the added benefit of reducing insulin, which is good if you’re hyperinsulinemic. But contrary to popular belief, reducing insulin alone won’t make you lose weight. You need the calorie reduction.
Personally, i think fasting makes enormous sense for most people, and especially for females in the dating game. Men do judge you by what you eat. I can’t speak for all men, but I think most men don’t want delicate flowers who can only eat 400 calories. They think you’ll be trying to get them to eat 400 calories. If you can pack away a 1000 calorie meal on a date and still look great…well that’s that stuff guys dream about.
You mentioned “reasonably active” earlier. What does that mean?
One of the things that I truly appreciate about my current plan is the diet first approach. Although programs like P90X and Insanity include diet plans, they are primarily billed as workout programs. I’ve done those programs without modifying my diet, and yes, you get more fit and lose some weight, but you won’t see real results unless you change the way you eat.
My current plan puts the emphasis on diet immediately. Most people can lose 4-8 pounds per month whereas most people can only gain 1-2 pounds of muscle per month. So if you want to see fast results, losing fat is way more effective. In my own case, after losing 20 pounds in 2 months, people are constantly telling me how much better I look. (Although I notice they were polite enough not to call me a fat pig until after I lost the weight.) I’ve never had similar results with just working out.
And speaking diets, most workout programs’ diets seem to consist of, “eat sawdust.” Combine flexible dieting and strategic intermittent fasting, you can eat some truly epic meals. A classic in the IIFYM community is a triple steak bowl from Chipotle. It’s 1000 to 1100 calories depending on whether you get rice or not and is incredibly filling. This was my dinner last Friday and the inspiration for the title of the post. It even looks like a happy face. (Steak on the side to make sure they don’t short you on steak.)
There’s NO way you lost weight eating a 1000+ calorie Chipotle bowl.
For a birthday, I had half a Captain Jack’s Buried Treasure from the Palm Beach Alehouse. It’s an Oreo/Heath Ice Cream Pie served over hot fudge (750 calories for half of it; the kids had the other half.) I’ve never lost weight so easily and felt great and satisfied. Most nights I finish my eating for the day with a 100 calorie chocolate/crunch wafer and a glass of whole raw milk. It doesn’t get much better than that.
Don’t do a Cheat Day; Refeed instead
One of the major mistakes a lot of people make on their diet is a cheat day. I know people who have eaten 4000 plus calories on their cheat days. That undoes an entire week of dieting. Instead, you should do a refeed day. On the refeed day, you increase your calories by about 500-600 calories. Most of your calories should come from carbohydrates. First, this feels (and tastes) awesome. Second, the increased carbohydrates support leptin production by fat cells. Leptin is a hormone that promotes satiety and encourages fat cells to give up fat instead of storing it.
Umm, The exercise?
Right. So, reasonably active means you do some physical exertion at least six days a week. If you have a strenuous day job (e.g., construction, beach attendant), you don’t really have to do anything else. Ideally you would do a strength workout 3 days a week for 30-45 minutes, and then do some light/recreational cardio on the off days. For me, working out with weights 3 times per week and and walking for about an hour on the days I don’t lift weights. I usually walk at night after the kids are in bed and listen to podcasts or play Castle Clash.
Some people are a little more addicted to exercise and want to do something higher intensity. High intensity Interval training (HIIT) is a good choice for these people. Sprints, hill sprints, bike sprints, jumping rope are good HIIT activities. The key is you don’t have to sweat much if you don’t want to; 45 minutes of walking will do you just fine.
How long will it take to see results?
The answer is it depends. If you have 60 pounds to lose, you’re going to see faster and more dramatic results than if you only have 10 pounds to lose. If you’ve already been dieting, it might take longer to lose weight. If you’re coming off a low carb diet, you’re actually going to gain weight at first while your body restores it’s glycogen storage.
If you’re completely out of shape, you’re going to actually build some muscle, so you might not see your weight go down at first, but you may notice that your clothes are looser. It’s a good idea to measure waist, biceps, and neck circumference for a men and waist, hips, thighs, and bust for women. Before and progress photos are also helpful.
If you’ve already been dieting and losing weight, it’s a good idea to eat maintenance calories for two weeks to kind of reset your metabolism and hormones before going on the calorie restriction. In my case, I had only been dieting for three weeks, so I went straight into flexible dieting, but because I was on the Atkins (low carb) diet, I gained 3-4 pounds and then dropped 8 pounds in the next 2 weeks.
So in general, if you’re starting from nothing, you should see pretty good results within 2-4 weeks. If you’re not seeing anything at all within 2 weeks, try lowering your calories by 200 a day for 2 weeks. If you’ve already been dieting/working out, things may be slower, so give it four weeks before you start mucking around. If you’re consistently hitting your calories and protein, and are reasonably active, you’ll lose weight.
Where can I learn more?
I’ll be posting updates over the next few weeks and months as I continue this journey to buffness. If you want me to e-mail you updates, just fill out the form below.
The goal of course is to look jacked like Dr Feigenbaum here, and not just skinny.
You look pretty good. What do you eat? — Jerry Seinfeld
Just skip to the end please
I lost 14 pounds on the Atkins diet and by intermittent fasting. Then I found flexible dieting and am now doing “if it fits your macros” (IIFYM) combined with strength training. I’m combining flexible dieting with intermittent fasting–by eating twice a day, the meals I do eat get to be bigger. No cardio beyond walking or recreational activities is required. (Editorial note: this post may sometimes seem a bit schizophrenic because I started writing it while I was doing Atkins/Keto but by the time I finished it I was no longer doing keto.)
The journey to fatness.
It’s embarrassing to admit it, but the past few years have been a journey toward obesity. I was a scrawny kid who could eat anything. I graduated high school at a whopping 145 pounds. Then I went to the Air Force Academy and went down to a downright skeletal 134 pounds in Basic Training.
A skeletal 134 pounds
By the time I graduated college I was 170 pounds. But then I got a job as a lifeguard and beach attendant at the Breaker’s Hotel and Resort in Palm Beach, FL. That took me down to 165 pounds of tanned, bleach-blonde muscle despite eating probably 5,000 calories a day. Unfortunately, my high school weight and beach experience reinforced the notion that I could eat whatever I want and still be thin.
Bleach blonde, tan, and buff. 165 pounds despite eating probably 5,000 calories per day.
…and then I got old. Everyone always said, “wait till you’re 40,” but it happened to me at 24. I was able to stave off the weight gain by sheer physical activity—capoeira, karate, tai chi. ballroom dancing, Latin dancing. And then I got married and got a real job. It’s a lot harder to maintain that kind of lifestyle when you’re working full time and have a wife who wants to spend time with you. I tipped the scales at a 185 pounds when I got married at 26. A few years later I was 200.
To Insanity and.. Beyond!
Obviously, I need to start exercising again, but we had moved, and I didn’t know where to find a good dojo and dance studio, so I turned to Beach Body. I started with Slim in 6 but all the lunges were too hard on my knees, so I switched to Power 90 (the much easier precursor to P90x). From the, the Power Half Hour, and eventually P90X itself. All of them work to some degree, but they take progressively more and more time. P90X requires a whopping hour and half a day. Six days a week. It’s just not fun. Then I tried the aptly named Insanity. I lasted three sessions. It really is insane, and not in a good way. The human body is not meant to work in that particular way. Anyway, my first son, Logan was born, and after 3 sleepless, exerciseless months. I figured I needed to workout again. That’s when I found Rushfit, designed for and marketed by MMA fighter George “Rush” St Pierre. I really liked the full body nature of the workouts and the relatively short time (30 minutes plus a 10 minute warm up). It was nice to have kick boxing moves performed by actual martial artists…but my knees didn’t like strain, so I had to take it easy on certain days. Still I was in overall good shape, although still over 200 pounds. (Nothing scarier than an overweight, in shape, martial artist right?)
And then. And then my second son, Corban was born, and the next thing you know I had only worked out twice in the last two years. One workout a year isn’t too bad, I think. Eventually, I tipped the pounds at a whopping 212 pounds!!!
Thar she blows!!!!
What’s love got to do with it?
Unfortunately, none of it really works, because exercising raises your appetite, and it’s too hard on a middle aging body to work out 6 days a week, and who has the time when you have two kids? The key, of course, is changing your diet. For years I had bought into the silliness that reducing carbohydrates and especially sugars will reduce insulin, which in turn makes it easier to lose weight. I had believed this for years, but didn’t want to do it, because…because I love carbs, and I especially love sugar. I love Coca Cola, and Cherry Pepsi, and cookies, and bread, and donuts, and cake (which is really just an icing delivery device). In fact, I told my nursing students that I was living proof that the health belief model was false. I believed in low carb diets, but I didn’t want to follow one…until I wanted family photos with the kids without me looking like a blimp.
My brother had lost 15 pounds or so in a month following the Atkins diet (a kind of low carb diet), and what he was doing seemed pretty reasonable, so I figured I’d try it…in a couple weeks.
How to lose 14 pounds in three weeks
Well, I started off by cheating. I got the flu. A bad flu. With stomach symptoms. To stop the symptoms I stopped eating. Between the starvation and the fever, I lost 6 pounds in 5 days. It would be a shame to waste that head start, so I went Atkins too. The basic Atkins diet is eat high protein, high fat meals, with low carbohydrates. The Atkins diet has “phases” where you vary the amount of carbohydrate. Basically, in the “induction phase” you try to eat less than 20 grams of carbohydrate per day. That turns out to be a lot harder than you might think. The key is that during induction you eat as much as you want as long as it’s low carb. This turns out to be a great diet for carnivores. You typically stay in induction for 2-4 weeks. After induction, you ease up on the carb restrictions but still stay low carb. Once you make your weight goal, then you raise the carbs up to the point you start to gain weight again, and then reduce back to a stable weight. That final stage very much resembles a Paleo diet.
I also started using “intermittent fasting,” which is a essentially, trying to do all your eating in an 8 hour window, and then not eating (fasting) for 16 hours. For me, that means I try to be done eating around 8pm and then I don’t eat until around 11 or 12 the next day. Since beginning using the low carb, intermittent fasting diet, I have lost 14 pounds in 3 weeks (including the 6 pounds from the flu). I’m rarely “starving” although I do get quite hungry around 5pm. Most of the days I only eat two meals (just because of convenience), although I do eat some snacks. An important point with intermittent fasting is that you can choose your fasting window. If you work out first thing in the morning, you probably don’t want to wait until noon to eat. If you sleep in, you could delay until 4pm. And feel free to break the routine for social life. The key is to choose something that works for your schedule and your life.
What the heck do you eat? That must be boring!
Low carb dieting does take some imagination, but really, you can have quite a lot. Over the next few days, I’ll post some recipes, but here are some sample meals:
Cheeseburger (no bun)
Pulled pork with low carb barbeque sauce
Arugula steak salad
Chicken Alfredo over a bed of arugula
Eggs and bacon
Egg pucks (crustless mini quiches)
Baked chicken and spinach salad
Almond crusted tilapia (or any fish for that matter)
Uncured Turkey and a slice of cheese (with mustard and pickle if you like)
Parmesan Cheese Whisps (1 carb per serving; currently available at Costco)
Small handful of almonds (preferably flavored with something other than sugar)
Avocado chocolate pudding
Dark chocolate (do yourself a favor and buy some good stuff; life’s too short to eat crappy chocolate)
Generally speaking you can have as much meat, eggs, butter, bacon, and leafy green vegetables as you like. You can eat some fruits and vegetables that are high carbohydrate in moderation. For example a six inch section of cucumber has 6 carbs. That’s more than a quarter of your allotment during induction phase, but if you only eat a two inch section, that’s only 2 carbs.
Isn’t Atkins really hard to follow?
Quite honestly, Atkins is a very easy diet once you get the right mindset. You eat as much as you want, as long as it’s not carbohydrate. It does take some effort, because we are surrounded by delicious smelling carbohydrates. The last thing I eat every day are four large bittersweet chocolate chips; about 5 carbs. The most important thing is not to hang around food you shouldn’t be eating when you’re hungry.
Unfortunately, the weightloss can be temporary. It’s the total caloric intake that determines weight loss/gain. Sometimes your appetite adjusts to the diet and you simply start eating more, or maybe you discover how to cheat with “paleo desserts.” Other issues with the diet include that it can be constipating and can cause leg cramps. Both of these issues can be dealt with by taking magnesium and potassium supplements. You’ll also find that you need to drink a lot more water while on the Atkins diet.
But isn’t fat bad for you?
There isn’t enough space in this post to go over all the ways this myth is wrong. Let’s just say, “no.” Fat is not bad for you. Now, there is a caveat, because today’s mass produced meat is not necessarily the healthiest, and sick animals often store toxins in their fat. So, whenever possible, you should try to eat pastured meat from local farms. For further reading, I’d suggest Dr Ravnskov’s Fat and Cholesterol are Good For You.
Insulin is the key, but what’s the question?
I had bought the lie that the real enemy is insulin. In theory, high carbohydrate meals cause an increased insulin response to prevent high blood sugar. Insulin tells your liver and muscle cells to pull in sugar and make glycogen out of it. When your liver runs out of room to store glycogen, it starts making triglycerides from fatty acid (fat transport molecules). Then it sends the triglycerides out through your blood where the insulin to tells fat cells to pull in them in and store them as body fat. Meanwhile, the surge of insulin spurs a fall in blood sugar levels triggering a hunger reaction within a few hours, causing the cycle to repeat itself over and over.
Reducing carbs may help reduce the magnitude of insulin spikes and have an impact on appetite, but the key to weightloss is eating fewer calories, and that’s the beauty of a low carb diet. When you cut out all those glorious carbs…baked potatoes, cookies, French Fries, donuts…you also cut out an enormous amount of fats too, resulting in a gigantic calorie reduction.
How long are planning on keeping this madness up?
Actually, I’ve already stopped. My goal is 175 pounds, but Atkins, although doable, isn’t always that fun. And carbs aren’t the real issue anyway. The Flexible Dieting approach is much more in line with my long term goals and overall eating philosophy. I’ve decided to go with a fairly aggressive deficit which is designed to help you lose between a pound and a half to two pounds of fat per week while maintaining or even building muscle.
The Flexible Dieting approach is a bit more complicated than Atkins, because you have to calculate your calorie deficit to achieve your desired weight, and then try to “hit your macros” which means eat the appropriate ratio of protein, fat, and carbohydrates each day (although in reality it’s fairly lenient as long as you eat enough protein to maintain your muscle).
I’m also using intermittent fasting, which I like, and you can eat fun things like dessert every now and then as long as you adjust the rest of your diet. The basic plan is to push your first meal of the day as far back as possible and then eat two meals, one large and one small. The nice thing about the eating this way, is your large meal can be a feast! Even Chipotle! (Although you’re supposed to order triple chicken to get enough protein.) Once you’ve tracked everything for a week or two, you get the hang of things, and you don’t have to track as much.
But you’re not fat
I don’t know why people say this. They’re obviously 1) blind, 2) lying, 3) trying to minimize/rationalize their own fat inertia. Admitting you have a problem is the first step to recovery. I’m fat…not because of lack of exercise…but because of my love of sugar. I really think that in my case I was actually addicted to large amounts of carbohydrate (particularly sugar). So I think going Atkins for a little while was a necessary step for me, because it allowed me to truly break the habit. But eating low carb all the time can lead to low leptin levels (a hormone ) that in turn makes it harder to lose weight.
Are you allowed to work out while fasting?
Yup. I had originally planned on mostly following the workout plan espoused by Martin Berkhan of LeanGains.com. It’s essentially using heavy weights in compound movements. The core movements are dead lifts, chin ups, squats, and bench press. You try to work out three times a week. You do three sets of each exercise. You try to do 2 – 3 sets with very heavy weight on the first set (~5 Reps Max). Then drop the drop the weight 10% and try to do 5-7 reps for the next two sets. Martin calls this a reverse pyramid. That’s it. No “cardio” other than recreational (e.g., riding a bike for fun, walking the dog, playing ultimate frisbee, etc.). For those of you addicted to cardio, do yourself a favor and read Mark Sisson’s The Case Against Chronic Cardio.
Martin’s website is worth reading, although he hasn’t written their lately, his philosophy makes a lot of sense, and you certainly can’t argue with the results. (See video below. Warning: You might want to turn down your volume unless you really like Swedish heavy metal.)
But Martin hadn’t updated his website in over 4 years, so I found other gurus online. Some of them have hundreds of free videos. In another video I’ll list some of the ones I like and who I would recommend avoiding.
That’s it for it now
I’ll keep you posted over the next few weeks as to my progress.
Here is a comparison of the Blue Yeti and the Audio Technica ATR2100. Both of them are USB microphones that are commonly recommended for podcasters. The Yeti is a heavy, big, fat condenser microphone and is extremely sensitive. I used it to record over a hundred hours of lecture for some online graduate courses (not the lectures on this site though). The ATR2100 is brand new, and this is quite literally the first thing I did with it.
Overall, I like the ATR2100 better. I think the sound quality is more or less similar, but the plosives are not quite as pronounced as with the Yeti. I haven’t had a chance to test the ATR2100 for ambient noise yet, because the kiddos are sleeping, but tomorrow I’ll record some ambient noise with both microphones as a follow up test.
Click the play button below to hear the comparison file.
It’s been long overdue. I’ve been hating Drupal for several years now, but I had cobbled together my own podcasting/class platform using CCK and Views in Drupal, and it just seemed like to big a job to migrate. But Drupal forced my hand by making there be no easy upgrade path to Drupal 7 (and now 8 is about to come out).
So I followed this handy guide from Another Cup of Coffee on migrating Drupal sites to WordPress.
Some challenges and things I learned:
Following the guide:
The guide has directional (curly) quotation marks in it, so you’ll have to fix the queries before running them.
Even if you want to have custom table prefixes, stick with wp_ for the migration, and then change the prefixes. Otherwise, you’ll have to manually fix every single query. Same with the database names.
Migrating the Drupal vocabulary was the hardest part. In the end, it would have been easier to simply convert everything to a tag and then use the WordPress Plugin Term Management Tools to turn the individual terms I wanted back into categories.
As I did it, converting the vocabulary probably took four hours, while the rest of the migration took about 30 minutes.
When I finally got done, the categories were associated with the correct posts, and they were available to assign to new posts in the author screen, but you couldn’t see any of them in the Categories screen in the dashboard.
To solve the problem, I had to set the parent value of all the categories to 0, and then re-assign the parent relationships in the dashboard.
Term Management Tools is very inconspicuous. The only way you’ll know it’s installed is if you click the bulk actions drop down in Tag or Categories in the Dashboard. It will let you merge multiple terms together or convert from Tag to Category or Vice Versa. It will also let you set the parent term.
WordPress and Nginx do NOT get along well when WordPress is installed in a directory. The main site will work just fine, but wp-admin will likely generate infinite redirect loops. I installed it that way so that it would be alongside my Drupal installation for migration purposes. Typing wp-admin/index.php should prevent the redirect loop.
If you upgrade WordPress and get a completely white, blank screen, you probably erased the default theme or didn’t install the new default theme.
The Fruitful theme is awesome. Their demo website’s humor is also a nice touch.
By default, WordPress menus only let you add (static) pages, categories, links, and custom. If you click the screen options at the top, it will let you add posts, tags, and formats.
Actually, if you’re thinking to yourself, “WordPress should be able to do…why isn’t that an option? Look in the screen options at the top. A lot of functionality is hidden by default (I guess so as not to overwhelm the casual user).
If you want to have a hierarchy of pages, using WordPress pages is much easier than trying to configure nesting categories. For example, if I want patheyman.com/nursing/patho-pharm-1/intro
create a page (not post) for nursing
then create a page for patho-pharm-1 and have its parent be nursing
then create a page for intro and have its parent be patho-pharm-1
You might need to preview or publish the page to get the path to “take”, but it will be vastly easier than getting subcategories to work right.
Another perk of using pages rather than posts for this job is that pages have an order attribute, so you can sort them.
The only downside to this technique is that your parent page won’t automatically link to the child pages, but there is a workaround for that.
Making nested drop down menus out parent/child pages is trivial.
You’ll probably want breadcrumbs for your pages too, and that can be accomplished by plugins or by modifying your template.
I put this move off way too long. WordPress is just so much easier to maintain and post.
DNS (Domain Name Server) is how the internet maps human style domain names (like google.com) to ip addresses. In the world of internet there are two types of IP address, static and dynamic. Static IP addresses don’t change, so it’s relatively easy to map domain names to the correct IP addresses. Dynamic IP addresses, on the other hand change from time to time. Most cable modem and DSL services provide dynamic IPs. That means that if you want host a file server on your home computer, or be able to access your files from work (or while on vacation), you’ll need some way to keep your IP address up to date in case your provider changes it.
This is the purpose (or one purpose) of Dynamic DNS providers such as dyndns.org or no-ip.com. You sign up for an account, choose a host/domain that you think you’ll remember, and then run a program on your computer or router that tells the service your current IP address. That way, no matter where you are me.ddns.net (or whatever you chose) will always point to your computer.
The problem is that DynDNS discontinued their free service and I could never seem to remember my No-IP hostname. Moreover, for a free account, in No-IP, you have to log in every month and tell them not to discontinue your service. Not too cumbersome, but still, can’t they just check user logs and only require that of dormant accounts?
So where do I get Dynamic DNS for free?
I thought there had to be a better way, enter Namecheap.com. In my Upgrade from Shared Hosting series, I suggested some benefits of separating your domain name registrar from your webhosting. I also suggested that you could even separate your DNS hosting from your Domain Name registrar. Namecheap.com happens to offer fairly competitive domain registration. They also offer free DNS hosting, so no matter, who you use as your domain registrar (even if it’s your webhost), you can still use Namecheap.com as your DNS host.
I did not know it until recently, but one of the features that Namecheap.com offers as part of their free DNS hosting is free Dynamic DNS. It is insanely easy to set up, and the best part is that the routers that I use have Namecheap.com already configured as a Dynamic DNS provider (meaning that you don’t have to run a program on your computer).
Describe this “easy” process
This only works if you’re using Namecheap as your DNS server. For this article, I’m assuming you already have it or have followed my directions here.
Log in to Namecheap and choose “Your Domains/Products”. Then scroll down to “Free DNS” and choose Hosted Domains.
Click on the domain name you want to use for Dynamic DNS.
Choose a “host” for your dynamic DNS. So, if you want me.mydomain.com to go to your home computer, create an A record for “me” with a short TTL (time to live) and give it the ip address 127.0.0.1. (it doesn’t really matter, because it will be overwritten by your update client). Choose save changes.
On the left hand side, under Advanced Options, choose Dynamic DNS.
Choose enable, and then look at the directions. If you’re following me, you can ignore everything except the password. Copy down the password, and open a new browser window.
Enter the Following URL into the Browser: https://dynamicdns.park-your-domain.com/update?host=[host_name]&domain=[domain.com]&password=[domain_password]/li>
The [host_name] is the host you created the A record for above. The [domain.com] is your domain name. The [domain_password] is the ppassword you copied a second ago. So using my example above, the address would read https://dynamicdns.park-your-domain.com/update?host=me&domain=mydomain.com]&password=efg3234ksdfj234jfsdlk3/
Hit enter and you’re done. Visiting that web address copies your current IP address into the A record you created in the first step. Now me.mydomain.com will point to the computer you used to enter the address above.
You need to have some way of updating your IP address. You could just bookmark the web address above and visit it once a day or once a week, but that’s not very automated or cool. You could set up a cron job to wget the address once a day (if you’re using Linux or Mac). Or you could install a DNS updater. But the easiest way is to configure your browser to do it for you.
The official Namecheap.com Dynamic DNS help files have directions for setting up a DD-WRT router. On my Asus router, after logging in, I went to WAN under Advanced settings (left hand side) and then chose DDNS from the options across the top of the page. Choose Namecheap from the server dropdown, and enter your information (host, domain name, password), hit save, and you’re done.
Free, simple, no brains Dynamic DNS. And the best part is you get to your own domain name instead of whatever leftovers DynDNS or No-IP happen to have available. Even if you don’t have a domain name, buying a domain from Namecheap (or other registrar) will cost you less than DynDNS’ least expensive option.
There are a bajillion possibilities, but I will concentrate on two classes of knives: gateway knives and step up knives in the gyuto style. The gateway knife is under $100 and will whet your appetite for Japanese knives. You could live quite happily with it forever, or you may want to get a better quality knife—the step up knife. Step up knives generally range from $200-$300, (you can go as high as $1000, but you’re no longer paying for cutting performance; you’re paying for art.). Note that many knife makers have several lines of knives at different price points with different steels and quality.
Gateway knives
This list is by no means exhaustive. It just lists a few of the more common recommendations.
Tojiro DP gyuto. Tojiro’s have a reputation for being a phenomenal value, having great steel, and being very sharp right out of the box. This makes the Tojiro an awesome gateway knife. (Apparently many Japanese knife makers do not pre-sharpen their knives so the buyer or retailer can customize the edge.) On Amazon with Prime shipping, you can get the 210mm (8.2 inch) for $62, the 240mm (9.4 inch) for $73, and the 270mm (10.6 inch) for $95. You could get the 210 and the 240 for the same price as a Wusthof Classic 8 inch chef knife at $135.The steel scores about a 60 on the Rockwell scale and has a VG-10 clad with a softer steel. The Tojiro DPs have large boxy handles, and in the past the fit and finish of the knives have supposedly been underwhelming. Update: The prices are now even more compelling: $50 for the 210mm, $58 for the 240mm, and $72 for the 270mm.
Fujiwara FKM gyuto. The Fujiwara’s are a monosteel that is just a little softer than the Tojiro, and has a repuatation for inconsistent fit and finish (sometimes better than the Tojiro, sometimes worse). The handles are supposed to be better. The softer steel is easier to sharpen, but the edge won’t last as long. Cost is $83 on Chef Knives to Go for the 240mm.
Richmond Artifex gyuto. Marc Richmond is the proprietor of Chef Knives to Go, and the Richmond is his house brand, meaning that he designed the knife, but it’s made by another company. The Artifex is the low-end of the Richmond line and the GT wa-gyuto can be had for ~$90 in 240mm. There is some controversy regarding the knives and the owner. Depending on who you listen to, the Artifex is either a great value, or so cheap because it’s—well, so cheap.
Gesshin Gyuto in 210mm. Slightly out of our target-under-$100 range, but undeniable quality. If Mark Richmond is controversial, Jonathan Broida is the exact opposite. Gesshin is Jon’s house brand, and this is as inexpensive as his line gets at $105.
Destination knives.
When it comes to destination knives, you have to decide whether you want to stick with a “do anything” knife or go for a more specialized knife. If you frequent the kitchen knife forums much, you’ll find talk of lasers which is a very thin, very light knife that cuts so easily, it might as well be a laser. The major downside of lasers is a propensity to bend in harder substances and their fragility.
First, for the “go to gyuto” I’ll just quote from boar_d_laze (BDL):
There are a lot of excellent “pro” knives in the next couple of price groups above the entry-levels — say, between $120 and $200. But, there’s also a lot more I’d like to know before making recommendations. Exactly how flexible is your budget for a chef’s knife and stones? Would you consider carbon (as opposed to stainless)? How about a semi-stainless tool steel (feel free to ask if you don’t know what that is)? Do you like very large or very small handles? Do you pinch grip? Claw? Cut and retreat? What’s your chopping style (German, French, push cut, don’t know)? Anything else you can tell me would help, too. “I don’t know” is a perfectly good answer.
In better than entry level stainless, I most often recommend Hiromoto G3, Kagayaki VG, MAC Pro, Masamoto VG, and Sakai Takayuki Grand Cheff… depending. In addition there are a lot of other great knives and several are bound to suit you…
The two knives I most often recommend for people more or less looking for the same things you are and with the same set of concerns [read the thread] are the MAC Pro and the Masamoto VG. The Kagayaki VG is more bang for the buck and uses a prestige alloy; but I don’t like its handle as much, nor the feel of its profile on the board, and there can be some issues with deburring.
The Masamoto has a profile as good as — and very much like — a Sabatier. In short, as good as it gets. There are some quality control issues, mostly centered around the handle, but these can be taken care of by the seller at time of purchase. You just have to make sure to tell them you want good F&F and a well-fitted handle before you give them your credit card number, and they’ll select a good one for you.
MACs are stiffer than any comparably thin gyuto and consequently feel more sturdier and more comfortable. The MAC Pro handle is the best I’ve ever used. F&F is typically very good — and if it’s not their warranty and U.S. support is almost in Henckels’ class. It’s the knife I recommend most often.
If you’re interested in a carbon steel gyuto, BDL raved about the Richmond Ultimatum Carbon wa-gyuto in 245mm for $199. Apparently it’s out of stock more than it’s in stock, so you may have to wait for it. Richmond also has a $99 Artifex 210mm Carbon Gyuto made from the same steel. As for the differences between the two knives other than the handle, 30mm of blade, and $100, you’ll have to ask Marc Richmond.
I’ve had a 52100 Ultimatum for not quite a year, and the more I use it the more I like it. In it’s own (and very different, robust) way, it’s as good as my Konosuke HDs [see below]. Last night I wanted to slice one (count them, one) tomato and was practically in tears because all I could find were my three Konos and a drawer full of Sabs [Sabatier]. Well maybe not tears, but my lower lip was trembling. It’s completely pushed the Sabs out of the rotation. It’s actually a lot like a Sab. Strong, agile, sweet-profile, comfortable, gets sharp, stays sharp, etc. But wa and a much better alloy. If you want to discuss it in more depth, of course we can.
Richmond’s expecting to get a lot in very soon; they don’t stay in stock long, but stay out of stock heap much plenty long. So if you’re thinking about jumping… Geronimo already…
If you’ve ever spent time with a carbon Sabatier chef’s knife, you have a very good idea of what to expect. The differences are that the Richmond has a wa-handle, weighs 3 ounces less, is balanced much further forward than a Sab, and is made of hugely better alloy.
Same sweet profile. Same lively feel on the board. Same indestructibility. Same versatility. Even more comfortable (although it took me awhile to get there). And there’s that alloy.
Takes a great edge, holds it a long time, can be steeled — but it won’t need it much. Fantastic feel on the stones. I’ve always been a carbon guy, 52100 is the best carbon I’ve ever used, and because of this knife it has become my favorite alloy. Which would matter a lot more if the differences between one really good alloy and another were significant, but they aren’t — not really.
I use my Ultimatum for everything; and that means things I wouldn’t dream of doing with the Kono, like trimming and portioning spareribs; and stupidly includes things I shouldn’t do, like splitting the occasional chicken. Bottom line: I’ve been abusing the knife for a year and haven’t hurt it yet.
The right face of the knife is convexed quite a bit. It should help keep food from sticking, but as a lefty it means nothing to me. On the other hand, my chopping action is a glide (which tends to knock stuff off) and I’m pretty conscientious about keeping the knife straight and moving it quickly, so I don’t have much of a problem with sticking anyway.
On the down side, the knife is a bit thick (but that’s the price you pay for anything that strong), and the blade came with some tool marks which were supposed to have been polished out by Richmond (the knife is made for them OEM by Lamson) but weren’t — although not much of a downside because fit and finish were otherwise very good to excellent. The cosmetics are mediocre.
The OOTB edge was adequate, 15*, minor convexing (probably incidental), 50/50 asymmetry, not much polish. I like my geometry much better, 12* flat bevel, 2:1 lefty, 8K finish. 8K is really too much, but I own the stone, so wotthehell. The ideal finish is probably somewhere in the 3K to 6K range. The asymmetry made a much larger positive difference than I’m used to mild asymmetry making — which may have something to do with the right-handed asymmetry of the blade’s grind, and/or may have been just enough to stop the knife from wedging. Whatever. I don’t know why it worked but it did. My advice to a left handed user is “you absolutely must,” and to a right handed user, “you should.”
It weighs 2 oz more than the Kono gyuto, 3 oz more than my 300mm Kono suji (which I use as a gyuto fairly frequently), and the Ultimatum not only feels quite a bit heavier than either Konosuke, but less neutrally balanced as well.
At the time I got the Ultimatum, I thought that I was beyond balance issues — but apparently having nothing but Konos and Sabs spoiled me. When I first started using it the knife felt awkward and heavy… with its balance point making it feel as heavy as one of my 10oz Sabs. Between that and the tool marks, I seriously considered sending it bacl. But after using it for a few hours, my grip adjusted a bit forward and I started to like the knife. After establishing my first edge, like turned to love; and although I never made a conscious effort, my grip kept evolving until the knife became an extension of my will; and it just keeps getting better and better.
Would I trade it for the Kono [see below] or vice versa? It’s not a decision I have to make, and am ecstatic not making it. If you’re asking me which would I recommend to someone buying one gyuto, the recommendation would be made on the basis of which class of knife — laser, robust, or something in between — would best suit. One size does not fit all. And in many cases, one size doesn’t even fit one.
Sharpening note: A well sharpened edge with lot of asymmetry — say 90/10 — will make the knife so sharp that it becomes difficult to handle. That is, unless you consciously hold it back it will fall through just about anything it touches. I prefer a more moderate asymmetry for its greater durability, and — it pains me to admit it — because I’m not as adaptable as I used to be, my skills are eroding and I don’t want a knife I have to think about.
The Kono HD is a laser. The first thing to understand about a laser is that it’s a laser. You either want a laser or you don’t. They all have the same weaknesses, and most of them have the same strengths. While there are differences between the top stainless lasers as compared to one another, they are extremely subtle — if ever there were a “U Pickem,” this is it. And, the same is true about the the same thing about the top carbon lasers. There are minor differences in F&F and appearance, but the different identities of the various stainless alloys doesn’t mean anything in the way of performance; and I think all of the carbon lasers are made of the same alloy, White #2. If there’s one made of VS2, then same same.
The Kono HD2 (the “2” represents a minor upgrade to the alloy) is slightly apart from other lasers in that its semi-stainless alloys has the same pleasant feeling on the stones as a carbon laser while being nearly as stain resistant as any of the true stainless knives.
It’s extremely light because it’s a laser. Because it’s so light, it seems fairly well balanced. It gets ridiculously sharp, because it’s a laser. The edge seems to stay sharp even as it dulls, because it’s a laser. The knife should not be steeled because it’s a laser. It doesn’t wedge because it’s a laser. Food doesn’t stick to it because it’s a laser.
You need to be careful around bones, partly because it’s a laser and partly because that’s just how it is with alloys which are stronger than they are tough. It doesn’t stain easily because it’s HD. It has an extremely sweet feel on the stones, because it’s HD.
The profile is excellent, if not quite Sabatier.
Mine is a 270mm HD from the first production run and has a handle most people don’t like, but I like very much. I’ve never heard a complaint about the current handle, which is a well-done ho-wood octagon. You can get all sorts of semi-custom wa handles as extra cost upgrades if you want.
So there you have it. Generally speaking your first Japanese knife should be a gyuto. Future posts will include:


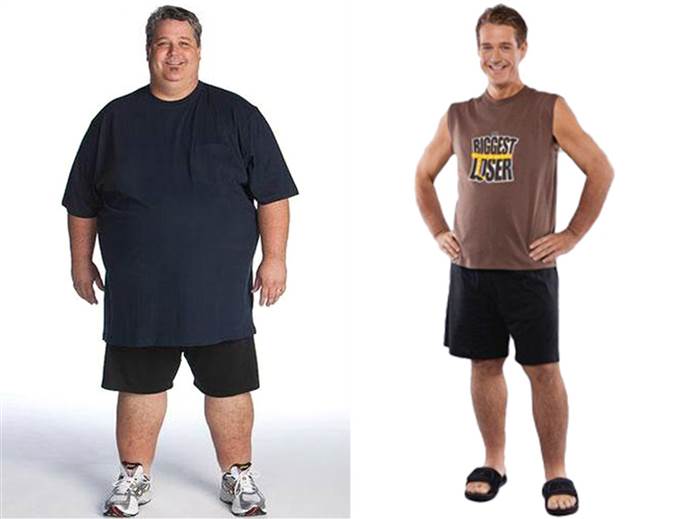

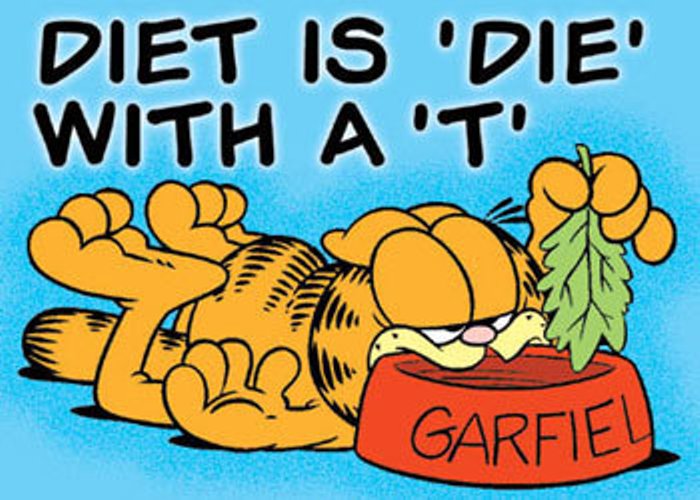
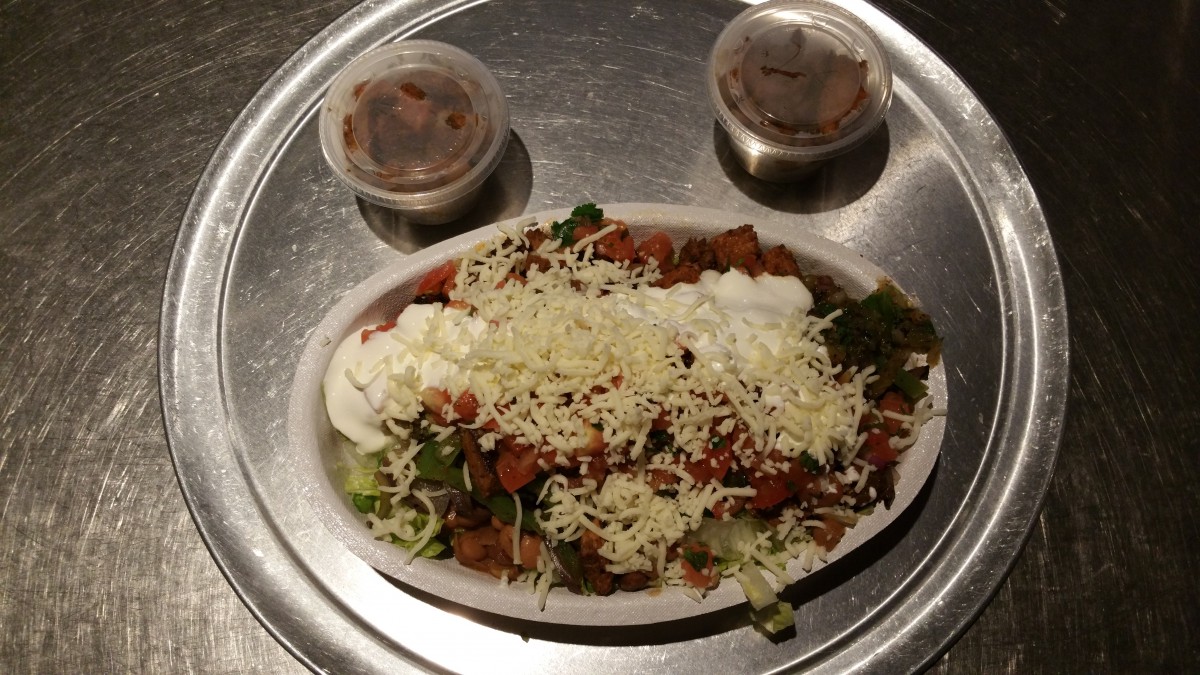


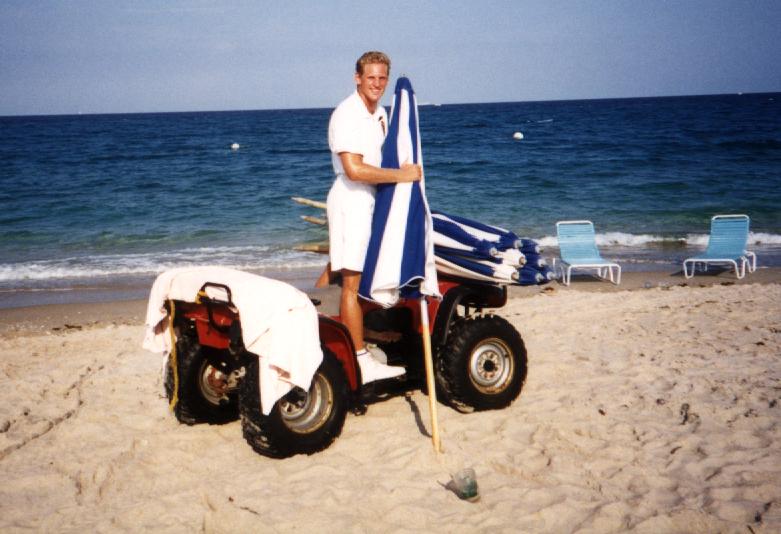


Recent Comments